Thursday 27 January 2011

The ROBOTS 2

 Right, another quick blog post before I have to go into Morley College, and teach stop motion again- luckily this evenings lesson is all about...Armatures! So I've done enough research for this one, I feel...
So below you see RIG without his arms- insert 'armless enough' Joke here- You can also see the magnet that supports the hip facia revealed in this shot too...
 Above is the weapon and hand arms detatched from the body- I'm goint to redesign these to include shoulders- but keep the spring detailing on the upper arm that I feel works well as an overall design concept- another of the 'design choices' in this project is 'repeating geometric patterns'- lots of circles, cubes, lines, hex and octagonal shapes wherever possible- and the springs reinforce that, I feel.
 The Hip area of RIG in close-up- you can see the magnet now clearly, and the hex tops of the allen key joints used at the hips- I wish I could get more of these joints! They are really nicely tensionable, and support a good deal of weight without protesting...I think the joints are seated within a carbon fibre enclosure, and aside from needing carving slightly to allow a larger range of movement, they are really good to begin with...I'd love to find a wholesale supplier for these joints.

 Extra Detail of the gun arm- as I mentioned, sourced from the top of a dead lamp- the switch moves too, I may have RIG operating the switch with his other hand to change weapon 'modes'- such as laser, flamethrower, etc.

Further basic construction shots- here you see the basic foundation Rig was built from, basically a metallic lampshade- someone on' the street of plenty' threw away a lamp that had three of these on it.
Drill through and insert a threaded rod that runs across the diameter. This isn't actually Rig, but another torso I've just started assembling- he may have fellows eventually.


 This is the facia for RIG's lower stomach- you can see it below magnetically attached in the chest area.
 Poor Old Rig, don't worry mate, you'll be walking the station again soon, I promise!
 The removable magnetically attached face section of ROD.
 ROD shown from the side so you can see his Loc Line spine- embellished with SUGRU rings, that makes it look more spine-like, and also easier to handle for major spine shifts- you can probably also see the K and S brass tubing in his shoulder area for rigging him- the rear of this puppet is still being finished and painted.
 A nicer shot of SPARK, with his little Skull, he was built from so many disparate bits and pieces, it is hard to remember where all the bits were from! His lower jaw was part of a lamp housing, the upper jaw was from the base of a leg section on a rusty barbecue that was rotting in the garden. The eye stems were part of a mini tripod- we found the eyes on a market stall, and bought them for 20 pence! We have no idea what they were for originally...
 His body- torso section was built primarily from a souvenir mini coffin collectors tin I was given that was 'The Nightmare before Christmas' merchandise- how appropriate is that??
I liked the coffin like shape, and the fact we were getting away from rectangles with him...It also means you can open up his body easily, and store more electrics/ mechanics away inside.
 The wheels were from a kids car toy- the axles are from the head of a mini tripod, and have a ball jpint built into them- so he can stand on tip toe by using these joints, if needed...
 The frame around his body is a concoction of hinged sections from various remote control cars- and means he can sway from side to side- incline himself forward, and do other subtle body shifts that can convey a lot of emotion- He is really surprisingly pliable, and also a gift to animate, because he doesn't have to walk!
 His hands are culled from Stikfas animation figures- I think- certainly some sort of plastic heavy footed animation figures I bought a long time ago...edit: they were 'Poze'em' figures.
They are really chunky n nice, with extended body piercing bar bells as fingers- and a hidden magnet fixed into his palms, for holding objects. The arms I'm unhappy with, and intend to improver on yet- in the tests done so far, his arms did not really have enough range of movement.
 SPARK separated into his two sections- you can see the Coffin shape of the tin box much clearer here.
 Give us a twirl, SPARK, Love!
 Detail around the rear of the wheeled base- the springs were also from remote control cars- If there's one thing I've learned over the last year, it is DO NOT THROW ANYTHING AWAY!
He can also raise up on his rear wheel here, so he would incline forward...
 The Gang altogether, to give a sense of their relative heights
 This is the stuff that has allowed me to do most of this, whilst waiting for the real metal working tools and workshop to do it all right...Milliput, JB weld (cold welding glue) and more recently SUGRU which has many useful applications for the animator.

Right, I'll have to leave it there for today, College beckons- thanks for all those who have taken a look and commented already, and please also note I have now enabled Comments for this Blog, so if you've got anything constructive to say- advice even- please step forward!


Wednesday 26 January 2011

ROBOTS!

Ok, its been a while, life throwing too many tomatoes my way, but lots of good things happening too, and more to tell you about. We are very close to moving into the Skatedog studio now, in fact we should be in there next week with a little luck- the build will begin in earnest then, setting up intelligent responses to lighting rigs and staging- so we're very excited about that. It's going to revolutionise what we can accomplish...
But mostly I have to begin telling you about the robots...this is what I've been sitting on for a while, trying to get the ideas and design together enough to feel it is worth sharing- We have been working on and off on the robots for about a year now, when other projects subsided- and we're getting fairly close now....We wanted to experiment with new joints we had discovered, and it seemed obvious after a little while that it would be useful to start experimenting with these kinds of puppets without immediately having to 'skin' them with Latex or Silicone- so, doubtlessly inspired by equal parts of the 'Terminator' puppet and Preston, the robot dog puppet from Aardman's 'A Close Shave'- in that exposed joints could be used as detailing. They were built from scratch using mostly found resources, coupled with a variety of ball and socket joints. We have tried many different aspects to the design as different resources have been found. There are three of them- they are all different, and have particular personalities...In this 'reveal', I'm going to be very elusive about plot details- You'll have to wait and see what they get up to, but I'll go so far as to say it is black comedy...I wanted there to be a 'found' aesthetic to them, and also pay homage slightly to the robot designs in classic British sci-fi comic 2000AD- particularly the ABC Warriors strip. I guess there's a bit of Star Wars running through this too.
There is a link to the video test sequences over on vimeo here:
http://vimeo.com/19218455
if you want to get straight on to seeing them come to life...
Anyway, I'll introduce them one at a time: This is ROD- this is an early shot of him under construction. His eyes don't have pupils yet, and his upper lip is unfinished here. He also seems to have just one heavy duty magnetic eyebrow, a design I shifted away from later. His shouldering is also very exposed here.
This is a little later- you can see he has his new riveted eyebrows, and his shoulders are growing in padding- also his blue eyes are lit here- i quite liked this design but felt his eyes were too malign here for the character I had in mind.

Another shot with a little red lighting- it really changes the colour of his eyes...The head holds 2 led lights, which have wires than run down to his waist- we can do red eyes or blue, and they also combine to create a purple quite close to what you see here...His head is built out of recycled materials, including washers, aluminium lighting fixtures, lighter tops, and other metal bits and pieces- His jaw is built from hinges taken off telescopic radio aerials. The front of his face is attached magnetically, and allows access to the mechanics below.


The current design- his eyes now have the washer 'pupils' which diffuses the lights better, and his upper jaw has come forward. Again, shoulder detail is also being added. Beneath the surface detailing he is basically built from animationsupplies armature components- although the spine in these puppets has now been replaced with heavy duty loc-line- they were getting so heavy with all the detailing, that a heavy duty spine seemed the best course of action.
The puppet with various surfacing facias applied- notably about the hip joints- again these attach magnetically and can be removed for access to the allen key sockets used at the hips. You can also see the LED cabling in this shot trailing out at the bottom. I guess you also see the hands here, which were built from scratch, and are essentially mini sandwich plates using the smallest nuts and bolts I could find, and the smallest brand of body piercing bar bells, cold welded into place. This has been a case of trial and error, but these hands are now holding up well, and are very expressive. They have hinged joints at the wrist, again sourced from radio aerials...

I reckon these hands can be improved on significantly once we get into the studio and start being able to machine metal properly- these were very much built on a kitchen bench, but they are holding up nicely...but we can improve them loads more yet.


Rod also has replacement eyes so he can appear to blink, and toe sections built from a furniture catch that include a threaded tie down cavity.

He also has rigging sections hidden in the shoulder area of his back, though these are currently having an overhaul!

We'll let him enjoy a little lie down and move on to his companion, who for now is called RIG.

RIG started life as a spotlight lamp body, and was likewise built from scratch from mostly found materials, his head was the starting point, and then the lamp waist added as a torso. His head was built from similar parts as ROD, but he has a very different character.
This was the basis of his torso as the character was put together- this was an early design in which we were using a simpler hip design- it looked a little too phallic though, and was slightly too narrow at the hips.
A close up of RIG's face- he has a similar hinged jaw, and much simpler cavity eyes- again, these are lit with either red or blue LED's fixed inside.
Rig's torso - a loc line spine section, fixed with lilliput to the hip joint, which again uses allen key joints- culled from remote control cars- the knees are animationsupplies standard joint sandwich plates, the feet once again are built from those catches culled from a television stand. Pretty much everything you see here except the loc line and the sandwich plates was found- most of this on the 'street of plenty'...
Rig has a weapon arm, and a normal arm- the weapon arm was built out of a section from a dead lamp, and was immediately pleasing- to me at least! The hip detail here is built from modified sections taken from a LED head torch. It is attached by magnetic panels epoxy glued to  the hip block, and the hip detailing.
 He now has all this extra detailing on the chest section, including these ribs, and the shoulder pads.
I've been running tests with RIG lately, and he has had issues with both his shoulders and his arms- so I've removed the current arms and I am looking at redeveloping these to a superior design- they need superior joints and a better design concept- He also needs fully armatured shoulders like ROD has- so he can shrug, and get in more expressive poitions. RIG's hand is not as reliable as ROD's, so we are going to build him a better hand in the immediate future. We also want to develop thigh detailing for this puppet, as we feel he is too thin in the leg area presently.
One area of RIG that has worked well so far has been his rigging point- he walked quite well in the early tests.
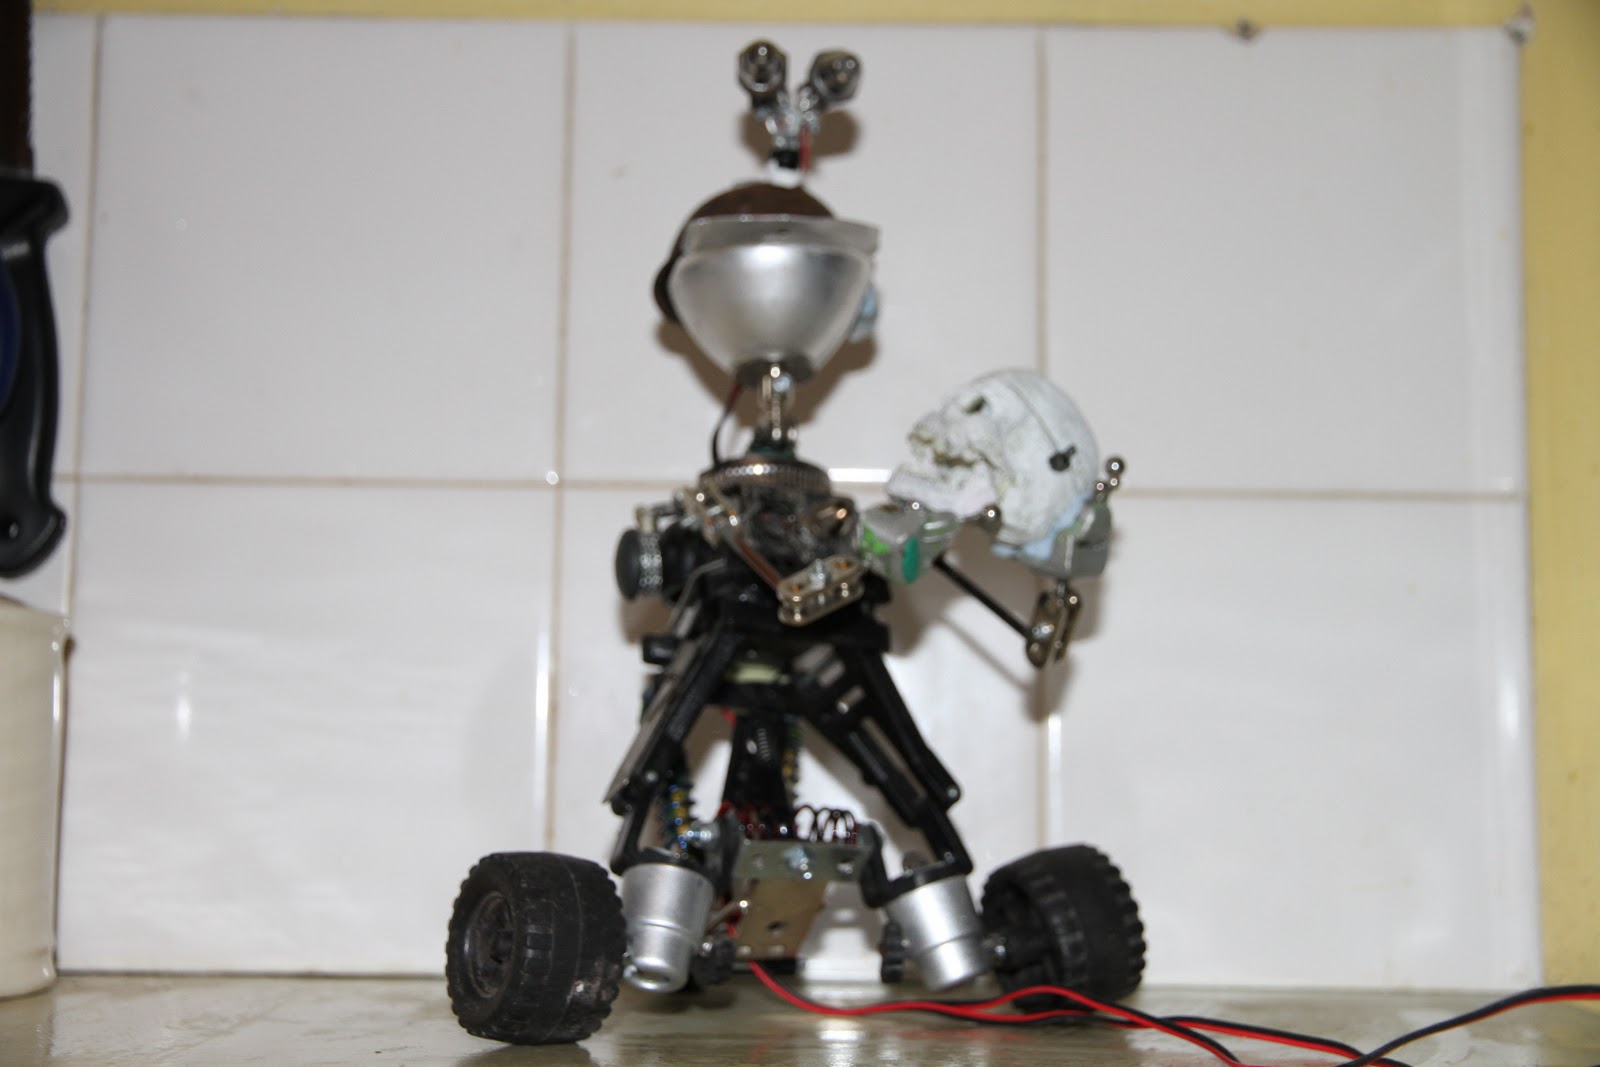
The last robot is SPARK- he is a wheeled robot, and a lot more basic- although he is clearly a very comic character...
He is still in development really, but we've been very pleased with his acting ability in the test footage- it is quite surprising how a puppet can begin to act in ways you don't anticipate as the designer to a certain extent- they DO have a strange personality of their own that only emerges as they start to move...
Right, that will have to do us for now- I'll come back to SPARK in more detail in future...very shortly. But I hope you like the robots! Go and see the test footage, if you haven't already.

Tuesday 11 January 2011

Budget armature plates

The last of the intro blogs, this one is just to bring you up to date with the various bits I've discovered or tested in the last 12 months, regarding cheaper ways of sourcing components for ball and socket armatures- chiefly sandwich plates of various types.
We'll deal with the worst first- this is an idea found in several animation skills books- the old 'take apart a bike chain approach. I found this to be most unsuccessful.


Taking the chain apart itself is a messy and stressful affair, and once that is achieved, you still need to drill holes into the centre of each bike chain link to hold 2 plates together. These plates are really tough, and drilling them kills drill bits...and you've also got to register them well to ensure parallel holes- this demands a good jig really. When this is done, I found the plates too willing to float, and very prone to scoring that left the joint very rough with dead spots- not a smooth tool for animation at all.

Maybe it could be done a lot smoother than I achieved, but i feel that if you are going to put this much effort into building joints, you may as well go the whole hog and machine perfect joints from metal stock instead.
So much for bike plates.

Next we arrive at finding sandwich plates for sale elsewhere- most stop motion fans have discovered these babies- the wonderful 'helping hands' tools that contain both sandwich plates, and fairly usable ball joint sections too-


the foot of a helping hands kit can also be converted into a useful base section for other tools such as wire based rigs. They are very good value at about £6-7 per unit on all manner of craft and model shops- i even used the magnifying glass itself in a character, the violinist, to make a surreal alternative to a head. The violinist starts the early point of my current showreel, and the armature used a few helping hands joints in the spine area, if you look closely.

http://vimeo.com/15684997

The Plates are fairly heavy duty, and if treat gently should not bend- I have bent a few accidentally, however. They are drilled open hole cavities, not an enclosing plate, and are also quite big- good for larger characters or heavy duty joints.

I've also found another cheap source for sandwich plates this year, in the local pound shops- I spotted telescopic inspection mirrors for sale at £1 each, which had a single sandwich plate between the positionable mirror, and the telescopic arm. Again, I found uses for the telescopic arms too. These inspection mirrors have been found in two sizes, approx 15mm and 20mm in length of the plate respectively, and both have proved very usable. Below you see a potential 'spiders leg' I fooled around with that used one large and one small joint from both types of inspection mirror.

They are enclosing plates, and are stamped with a good cavity that so far has held most of the puppet joints I've used them for with a good reliability. I also discovered if you were happy to buy bulk, it was easy to source them at a wholesale price that saved a bit more money. So far I have no complaints- I'll let you know about their longevity as they age, and I have bent the odd plate, but at this price they are very replacable...I hope, anyway, to move on up to machining purpose designed joints this year in any case.
Hope this is useful, next THE ROBOTS!!

Sunday 9 January 2011

Having it away with Coraline

Now, another post lurked on over at stopmotionanimation.com led me to pouring over some very revealing 'behind the scenes' shots of Coraline puppets- if I can find the link I'll also insert it here later- ah! there it is! The `Blog over at Scarlet stars studios! Take a look!
 http://www.scarletstarstudios.com/blog/archives/2009/02
but among these wonderful photos, I spotted one that particularly fascinated me- Coraline herself without either parts of her replacement faces on- as in here!


( slight aside- Ken Priebe's latest book also revealed how the Coraline faces were divided into upper and lower sections, thus offering more potential combinations than a library of 'whole' faces- however, this then neccesitated a post production artist going through every frame and doing the old magic eraser/ clone stamp routine in photoshop to remove and camouflage the line between upper and lower halves. When I heard that, it suddenly made sense in terms of how 'digital' Coraline felt to view- if everyone of your characters needs to have photoshop trickery paint out an aspect at the DEAD CENTRE of the characters face, it should be no wonder that something feels 'not quite right' about the animation from a traditional stop motion animation point of view. Don't get me wrong, it set new benchmarks all over the place for smoothness of style and action- all respect to Laika and their amazing talent!

BUT I do think having to paint out this dividing line has introduced something 'unreal' that detracts from that sense we normally get that a stop motion puppet is a real object in a real environment- for me a vitally important aspect of what makes it beautiful and work.) RANT OVER!

So, what I saw inside the head was two universal joints, on which half round glass eyes were fixed- giving a free floating pair of eyes, able to float effortlessly into any position. Eyes are an area I had earmarked for development, so I thought about this for a while. I couldn't replicate the LAIKA design, and I couldn't do replacement faces- at least , not until I get me a REPRAP - the budget route to open source, affordable 3d printing- seriously, check it out!
http://reprap.org/wiki/Main_Page
(surely on the 2011 shopping list however- so replacement faces may be on the horizon next!)
But back to the kitchen bench version first!
I'd seen similar universal joints before, inside my Dad's remote control vehicles and boats- so I knew you could source them from specialist RC model shops. I went and bought a few. They weren't too much, about £5-6 for a pair.
They give you this column which can float over to 90 degrees in any direction- far MORE than we would ever need. The one disadvantage with RC sized designs, is that each universal joint is actually longer than needed- so I sawed each tube down until it was half the original length- and able therefore to fit into a shallower head. I then took 2x 8mm Glastil eyes, and popped off the rear of the eyes, so they were half rounds only ( only the front half of each eyeball).


These were glued onto the universal joints- please note, the image seen below has universal joints which have not yet been cut down in length like mentioned above:
When they were reduced in size, I fixed the universal joints to a plate, then fixed them into a ping pong ball 'skull' like mentioned in the previous post.
The eyes here are too big for the head itself, so I gradually built up the head with offcuts from other ping pong balls, foam core and lots of glue- the emphasis throughout though was on keeping the weight down.


Then I started adding Milliput and shaping the head/face areas:


The head is now at the stage of getting prepared to have features added- I think this head is going to be an old Gent, possibly on the slightly crusty side of things. The silver areas are wafer thin neodymium magnets, which I've 'secreted' into the face design to hold pipe cleaner eyebrows able to adopt different shapes.
And then the mouth are was built up with another neodymium magnet ready to hold replacement mouths that I intend to use with this puppet.
And that is as far as he has got to date- the eyes are free floating within the skull cavity, and seem willing to work really well. I'm hoping the magnetic areas are as good a choice. I'll keep you in the loop with how he develops- for now we'll call him 'Gus'- next steps will be to add ears and nose, and work out how to colour his skin- I'm erring towards just painting him with the silicone paint I bought along with a consignment of 'Dragonskin' Silicone - it needs to be very thin to allow the magnets to have enough 'grab'.