Ok, welcome back, been a really good week with progress going on all over the place. My business working harder with animation projects going on in a Southall school as part of the Olypmpic cultural project, and I'll be teaching animation to really young kids tomorrow. Stop Motion Pro have decided to support this, which is also fantastic news...The street of plenty has been particularly generous yesterday, proving 3! heavy duty, metal topped tables, each about 1 meter x 1.5 meter, and with super solid legs giving 1 foot of clearance- absolutely perfect for the studio, absolutely free too...
I'll mention the studio too shortly, as it wont be long now before we are finally in there, and the game changes completely...
But for now, let's back track to the robots- as we left it I was unhappy with SPARK and his arms, so I decided to reconstruct here totally-
I took the defunct elbow sections from the earlier version of RIG, and used these for the upper arm sections- dressing them with more springs from suspension systems off remote control cars.- I also built new forearms sections, these were built different, to imply some damage or missing facia from the arms. The new arms have not only better movement and greater range, but they also seem to suit his personality better.
Next I took his head off and built a much better jaw support joint inside the head, as his jaw had been dangerously floppy at times during the last test shoot, and frequently had needed sneaky blu tack support during the shot- this is now replaced with
animationsupplies.net 6mm balls- and consequently much crisper and reliable.
Lastly, I dressed the neck joint with a spiral of wire coil, to camouflage the joint and it also ties him closer to the design used on ROD'S Neck. This wire coil, by the way, was bought from Games Workshop, a war-gaming franchise shop over here in the UK- this was sold as 25mm figure set dressing- it is meant to be razor wire at that scale, so it has an extra texture going on to represent the razors- it all just helps light interact interestingly with the puppets to have lots of texture.
I'm pretty happy now with SPARK'S overall shape, I think he really just needs some decaling to finish him off. I'll show you that when it's done.
This will probably neccesitate a trip to one of my favourite shops in London, the fantastic
www.comet-miniatures.com/ in Clapham, who for any sci fi obsessive are basically a vision of heaven- they have everything and more, and scratch build, cast and release impossible to find model kits. Honestly , you name it, they have it- probably in 2 or 3 scales!!
The guy who runs the shop is an old RAF boy, who built scale models for the RAF, and was sucked into VFX from there- He worked on the AT-AT's for 'Empire' - what more recommendation do you need?
So I should mention the studio as promised- Well, I have a studio space elsewhere in London, which has been being slowly converted from a bare section of an old box factory- when the conversion is finished I'll have a vastly bigger section of space to work in, and the kitchen bench may finally be somewhere my Missus can actually cook on...currently it is a nightmare of bits and pieces.
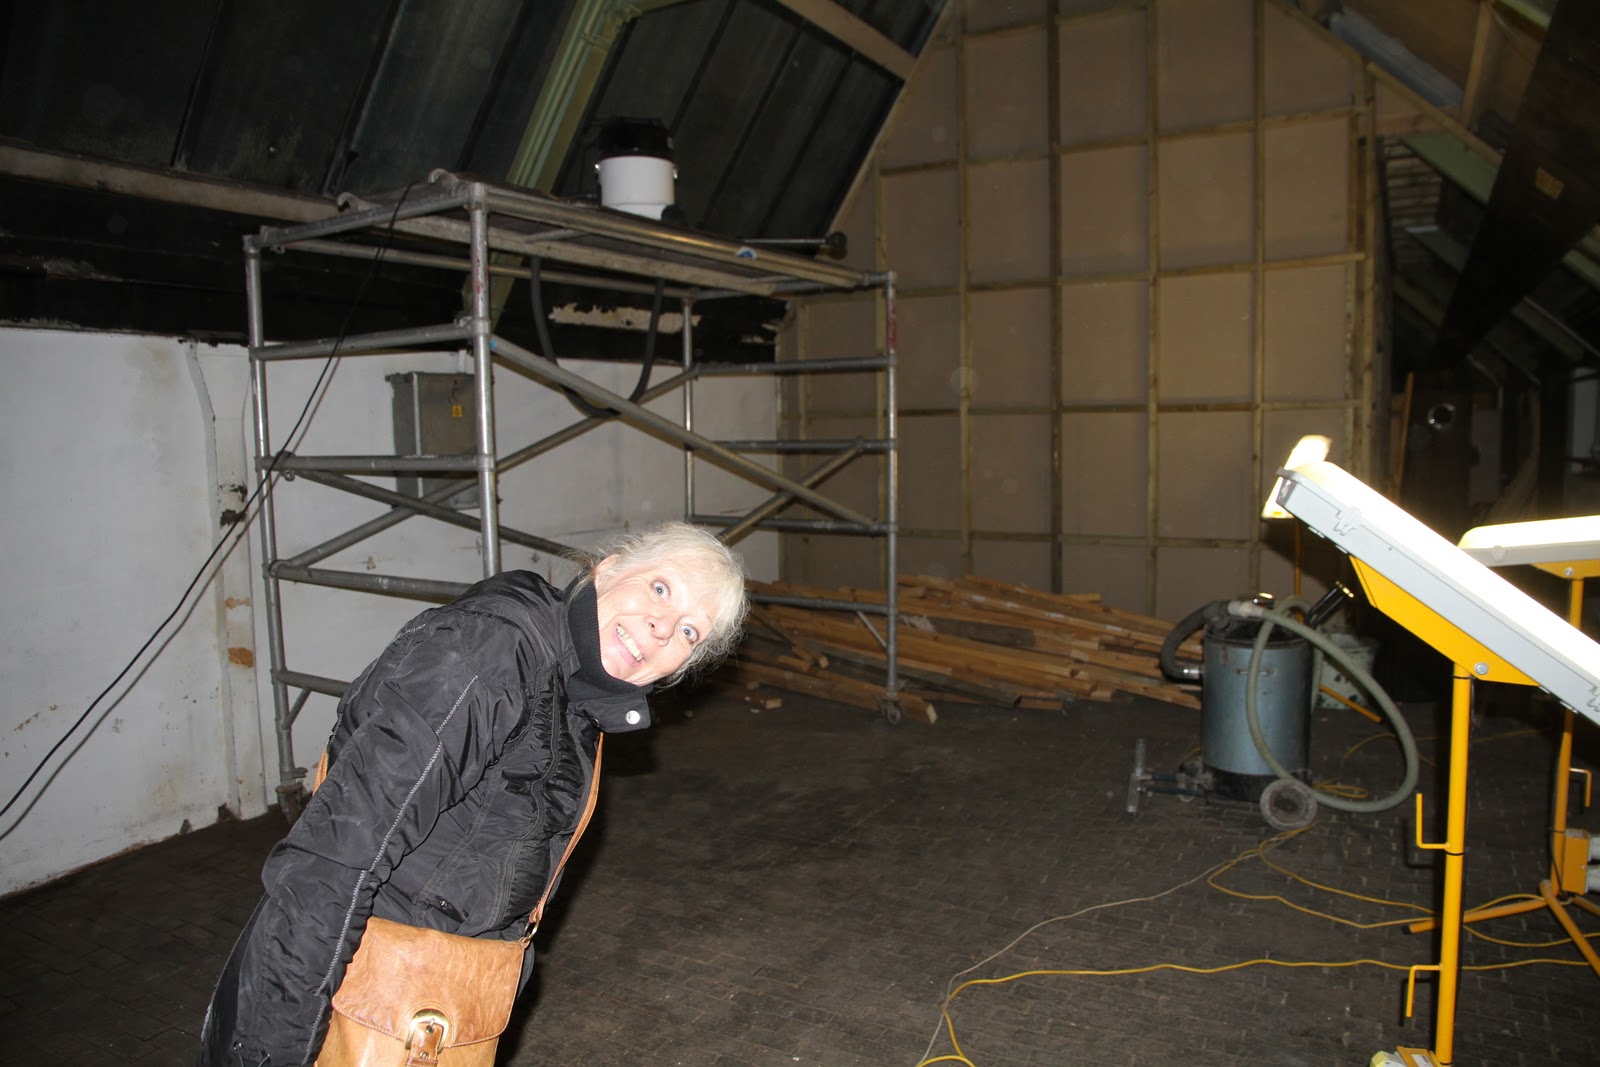
This was how it looked on my 2nd visit- You'll also spot Oska 'Mini-Me' H propping up the wall- that's my Boy. This was when the corridor was just that, a corridor- and not much more- note the long skylight which will have to be blocked out for shooting, but which will be lovely when the workshop is being used to build in.
The same view, without mini-me. The furniture is not mine, but there is lots available for anyone who wants it- the studio of Plenty! Actually, it really is, because as well as me in there, we have a huge set building company too, whose offcuts can easily be my raw material. Also lots of Photographers, artists, even robot sculptural engineers! How much more perfect could that be? Consequently it already has a huge metal workshop, with very experienced welders and metal workers nearby. But the crucial thing is the cheapness of this space- really, very cheap for London...

Ok, so here we see the first dividing wall going up- next door, doing most of this we have the Studio of Pete Santi, my mate and fellow skateboarder for over 10 years- we worked together on the 'Lab' animation for Channel 4 last year- Pete has a huge skill set of building and art abilities, he has been a full size set builder as well as property developer, and very wide ranging artist- It's great that we have adjoining spaces, for he will doubtless continue to be a powerful collaborator on emerging projects.
Oh, the other side of my genetic tree, Gilly D visited on this day, and helped me clean up the place. It had black dust in there on all the girders, from 65 years of cardboard box manufacture. Danger Will Robinson!
The floor is wonderful old wooden blocking, but is uneven in places- we'll need to clean out any problem sections.
Cleaning- if you look at the green girders by the windows here, you see the length size my bay will be- 2 sections of girders, approx 300 square feet- and with significant headroom. The plan is to mezzanine a section of the roof for additional storage- nothing too plush, just an elevated space.
A few months later, and suddenly all the walls are up, clad in plasterboard, and ready for prep for painting.
Looking from the far corner at the doorway arch. Plenty of room. And the mezzanine plan would also allow us to set up a scaffolding frame underneath the mezzanine to support lighting rigs, and possible camera rigs too. A thread this week over on
stopmotionanimation.com has seriously made building a camera motion control rig seem do-able. This would have massive implications for the ROBOT project.
The thread suggested using Arduino cards to control stepper motors from defunct Printers/scanners.
Here it is:
http://www.stopmotionanimation.com/dc/dcboard.php?az=show_topic&forum=12&topic_id=7408&mesg_id=7408&page=
A seriously good idea.
The view from just within the doorway- you can just see the triangular frame of the roof girders, which will support the mezzanine section.
Ok, finally, I have to get on with some animation today too, and so have quickly built a new section of set wall to create a corridor for ROD to walk down- mostly from CD Inlay trays, and old 2HD floppy discs- The central section is from the body of an old printer, I started taking apart for the motion control plan- actually everything inside the printer looks usable somewhere on the project.
I'll dress this section even more later, but it'll do for a quick test.
This is ROD set up ready for a test sequence. There are small green LED lights set into the centre of the cd inlay trays and they look pretty cool when lit up, a gentle glow at the centre of the rings. You can't really see it well in this particular shot, but you will in others. Thee is also a 'hatch doorway I built very quickly at the bottom of the corridor, out of the glass bed of the scanner. Again, I want more decalling and detail on this yet, but I think it adds a decent atmosphere for the sake of the test sequence.
ROD , ready to go on this evening's shot- wish me luck- I'm going to try this position with 2 different lenses and see what difference it makes. I'll post the results soon.
Oh! Lastly welcome to my latest blog follower, another stopmotionanimation fellow, Jon, whose work has been beautifully inspiring to me and others - Glad you've popped by. See Y'all soon.


No comments:
Post a Comment